

Staffing projects
Staffing a project means putting the right, available people on it — matching the skills the work needs with who has the capacity to do it. You do this in the project staffing modal, which has two views: an overview of who is assigned and when, and a staffing view for finding and assigning the right people.
Required rights
Project management — on the specific project you're staffing.
Open the staffing modal
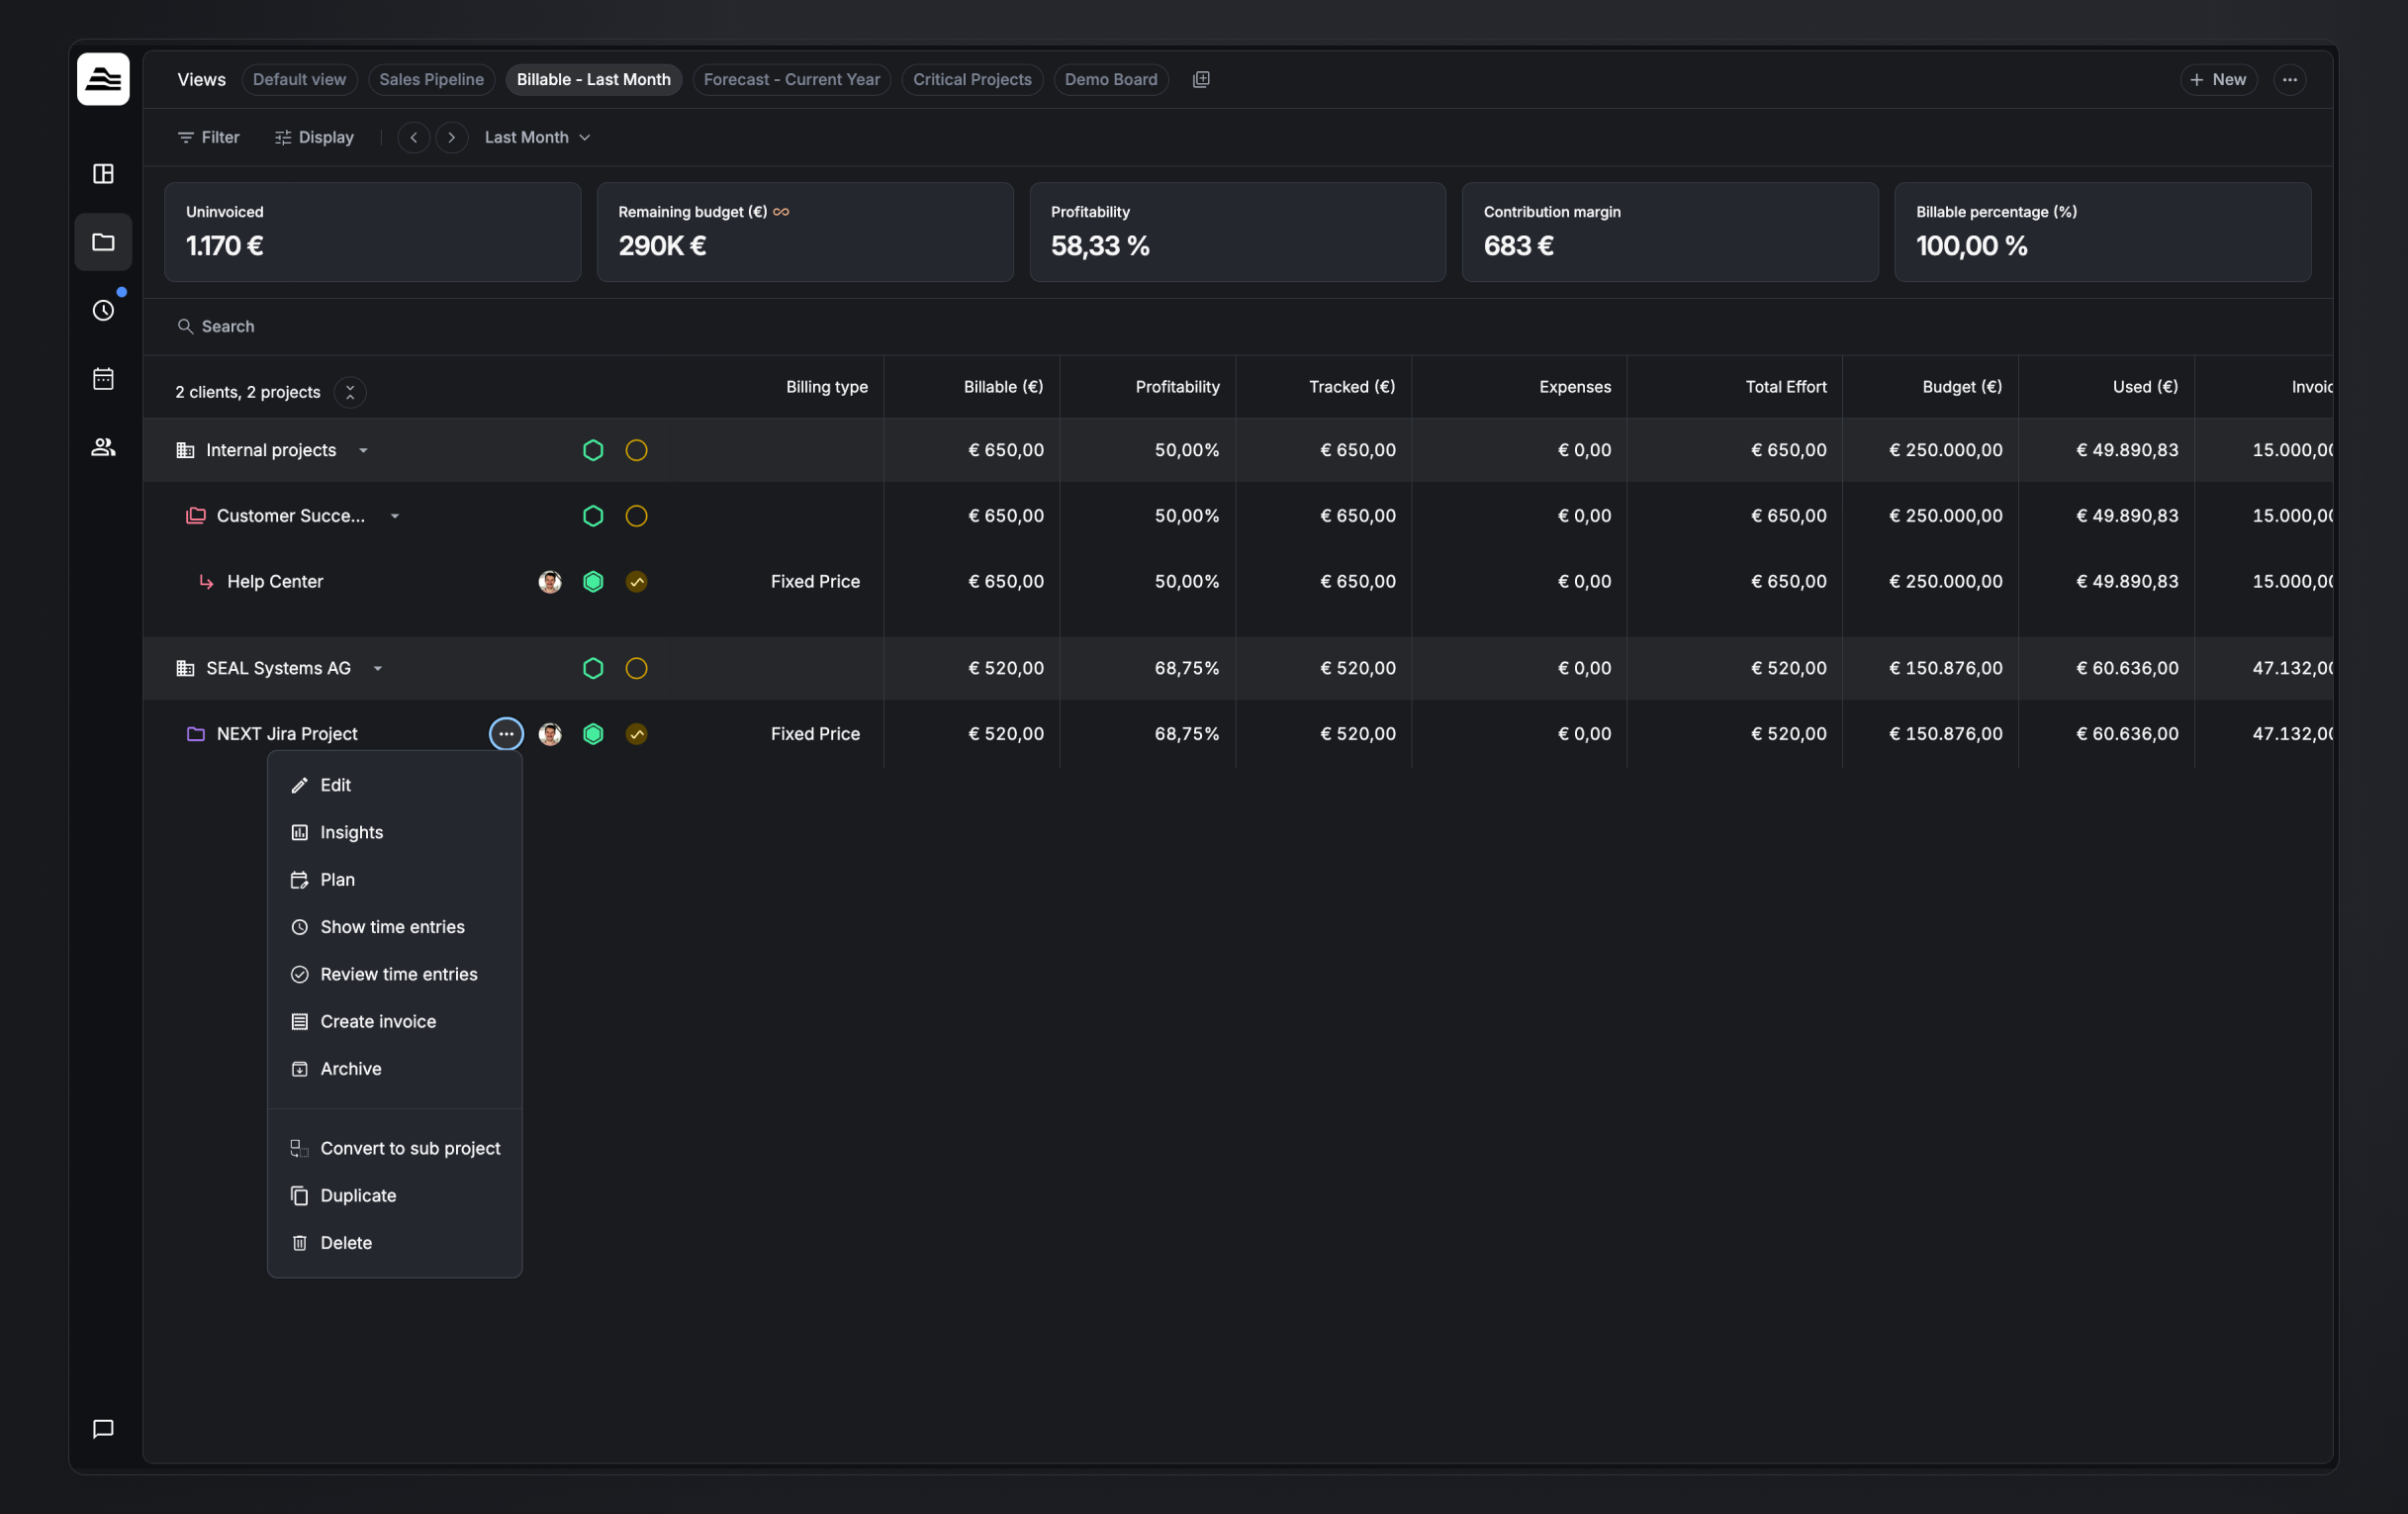
The staffing modal can be opened from any project's context menu. On the Clients & projects board (or wherever a project's ⋯ menu appears), open the menu and choose Plan. This opens Project staffing for that project.
Read the planning overview
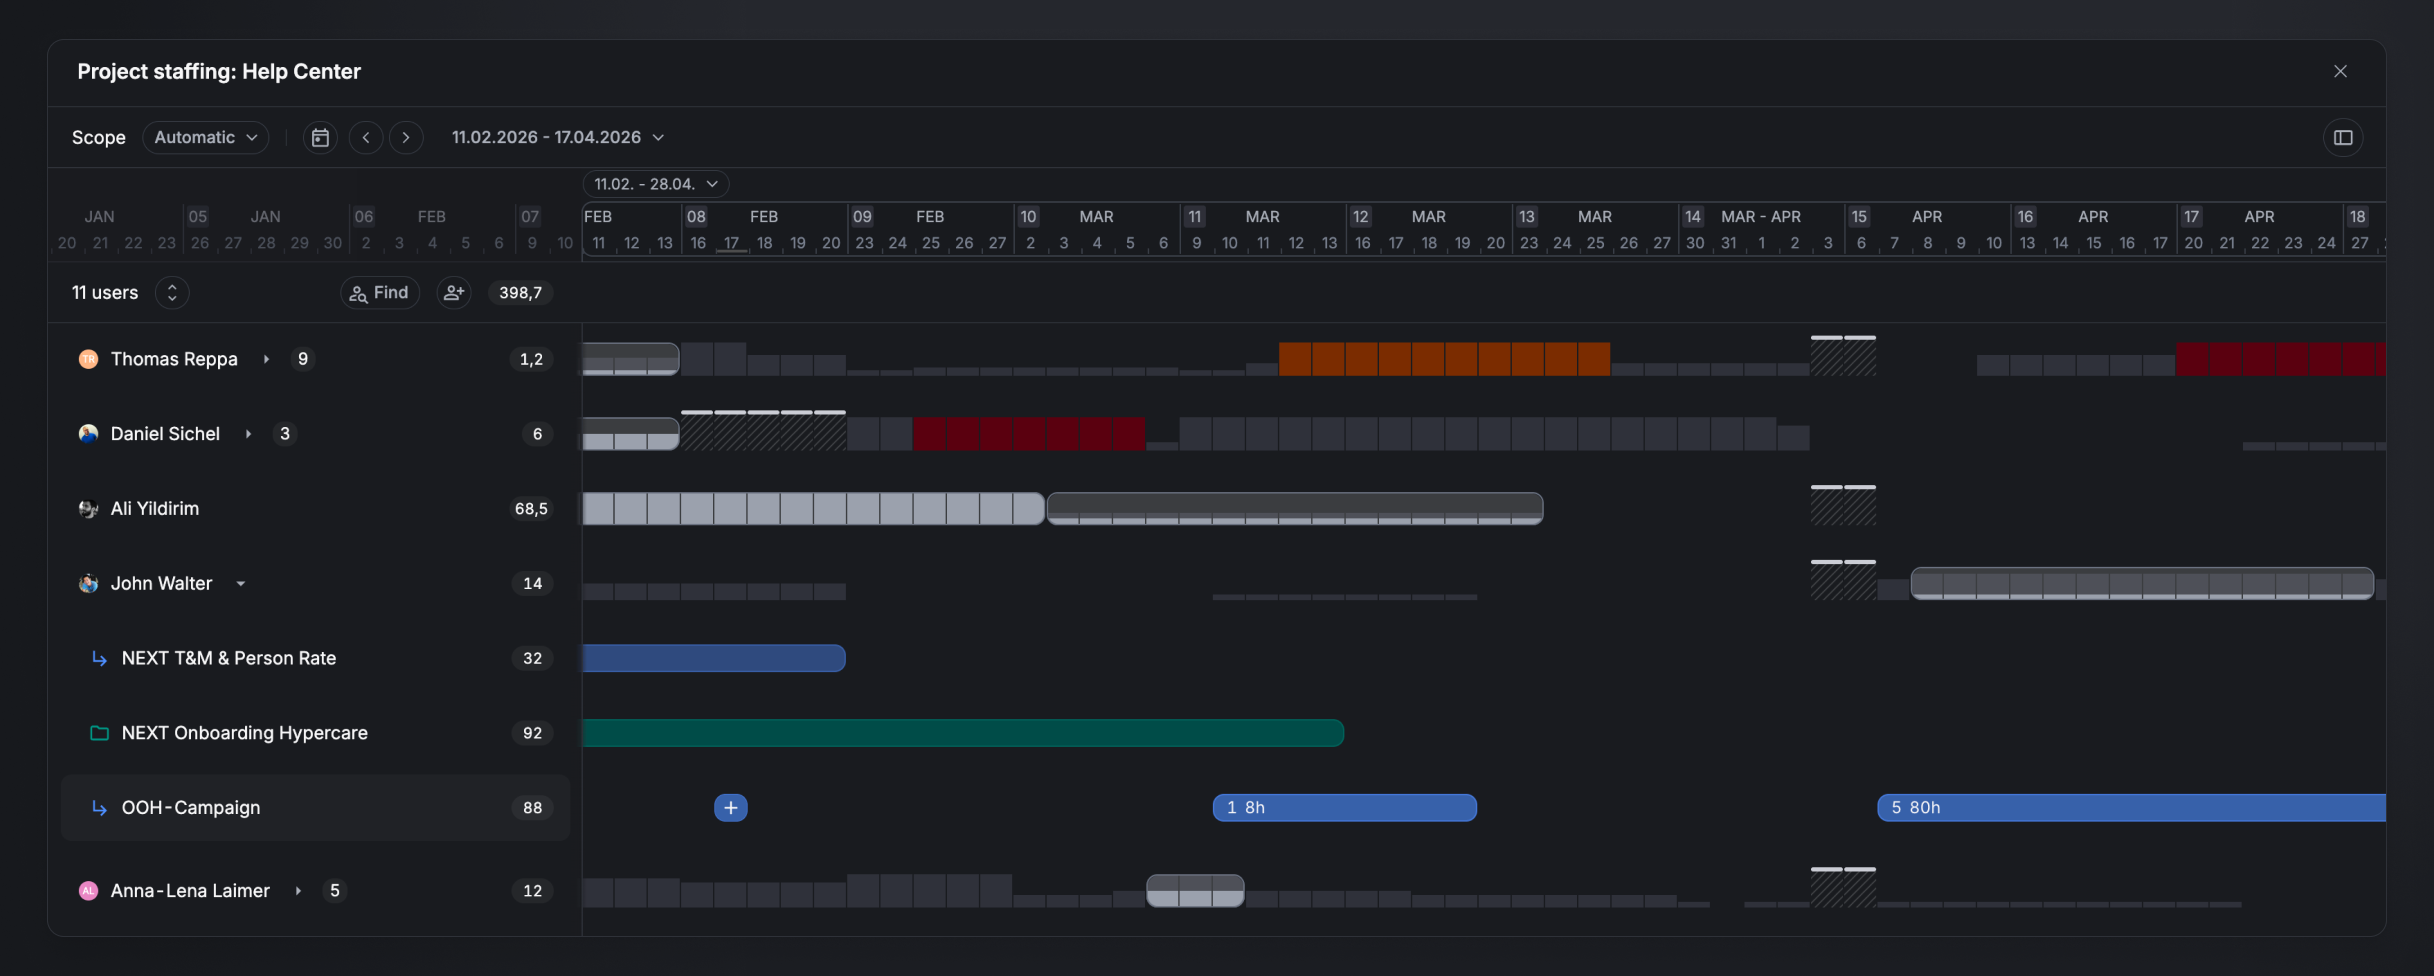
The overview lists the people planned on the project. Each row shows that person's planning across the timeline alongside their availability:
- Grey pills are the assignments on the project currently open in the modal.
- Coloured smaller pills are that person's assignments on other projects.
- The background blocks show capacity per planning unit (a day or a week): the taller the block, the less capacity the person has left in that unit. When a unit is overbooked the block turns orange (warning) or red (critical). These thresholds are set in the project settings.
Hover a row to see the exact capacity for each planning unit. Expand a row to see the other projects the person is planned on.
The number on each row is the hours planned for that person on this project within the scope; the total shown by the Find control (e.g. 168) is the total planned hours in scope.
The property panel on the right shows the planning-related properties of the project — or of the project currently selected in the table:
- General — Client, Super project, Budget type, State, Health, Duration, Lead.
- Planning — Planning budget, Future planned, Planned (in scope), Tracked, Unplanned.
- Future planned — the planned hours per person.
- Milestones.
Set the scope and viewport
The scope is the planning window you're working in. The range picker attached to the scope/timeline handle sets the scope date range, while the secondary range pill sets the visible viewport within it. When set to Automatic, the two match. Use the Custom scope and the arrows to move the window.
Find and assign staff
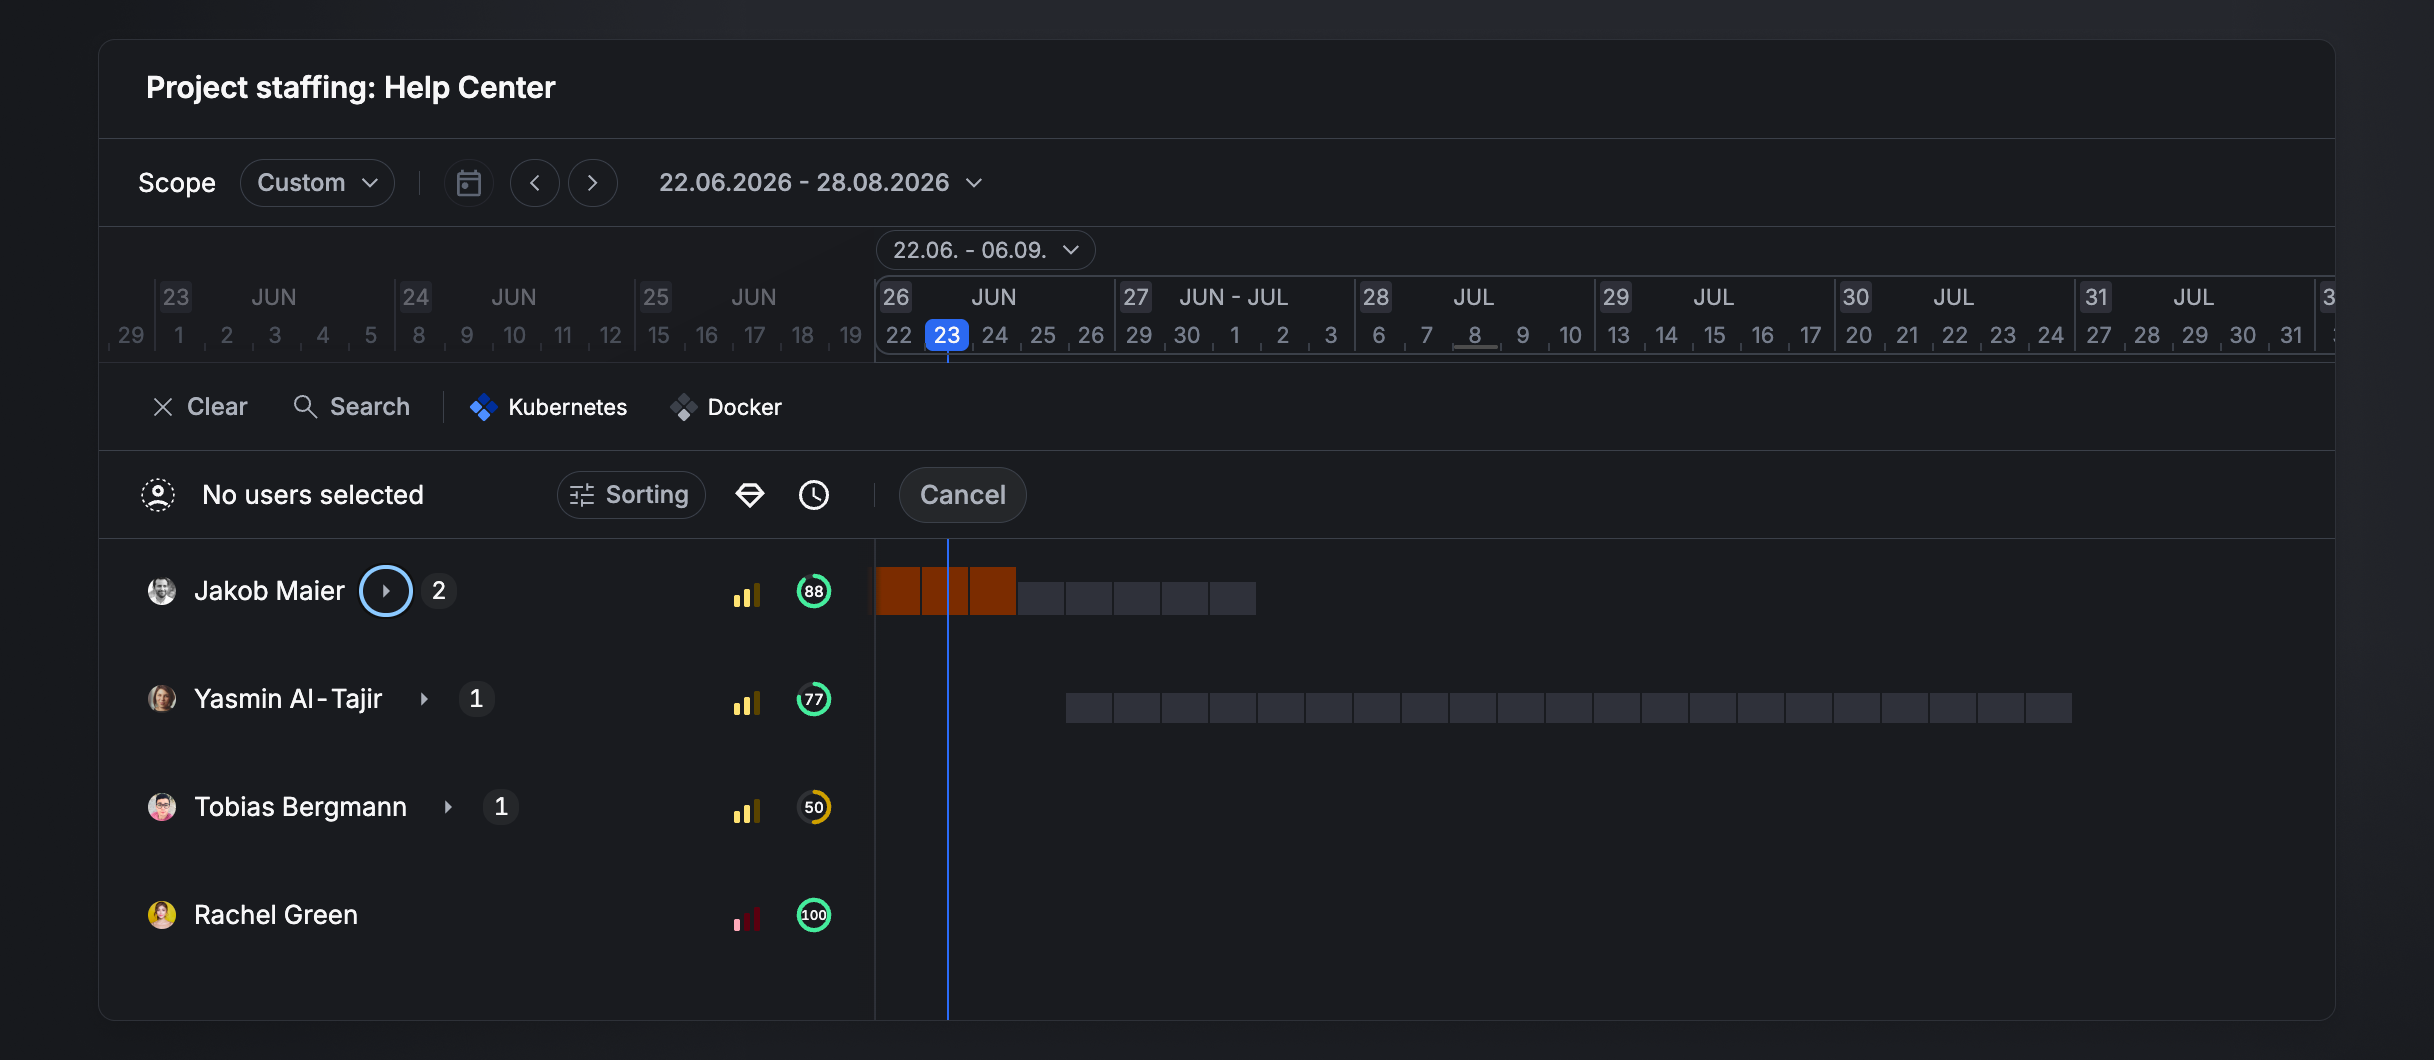
Switch to the staffing view with Find staff. This opens the list of available people, with a donut showing each person's availability (as a percentage) within the planning scope. Two column headers describe what you're sorting and reading by: gem = skill matching and clock = capacity. Sorting orders the list.
Filter the list
Click Search to filter for staff, teams, skills and labels. Selecting a skill (for example Kubernetes or Docker) narrows the list to people who have it and activates the bar-chart icon next to each person — it shows how well that person's skills match the active skill search, and is only enabled while a skill search is running.
Create and save assignments
Plan a person on the timeline to create an assignment. New assignments are not applied to the planning until you click Save assignments; Cancel discards them. As you change the search or filter terms, people who already have unsaved assignments persist in the list (grouped as Assigned users) until you save or cancel.
Skill-based staffing relies on skills being assigned to your staff — see Assign skills to staff.
Related
- Project planner — the project-side planning workflow.
- Utilization planner — plan from the people side.
- Skills overview — what skills are and how they're set up.
- Assign skills to staff — get skills onto your team so they're searchable.